Simple steps for MailerLite setup
Easily start sending newsletters today with MailerLite installation.
(2 minutes)
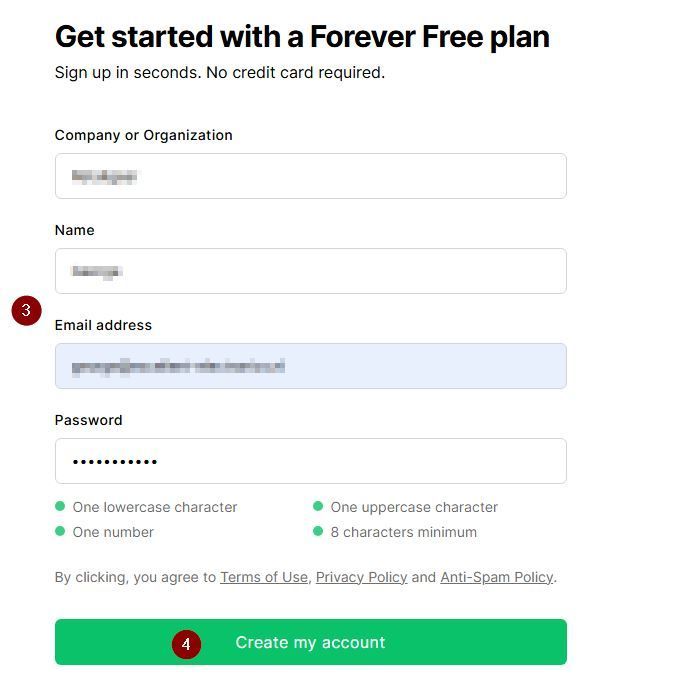
1. Create a free account
This also includes access to the premium features for 30 days free of charge.
- Click on the button above to create a free account at MailerLite.
- The website opens in a new tab. Click the “Sign up” button in the top-right corner.
- Fill in your company name, your name, your company email address and a password you like.
- Click on the green button 'Create my account'
(1 minute)
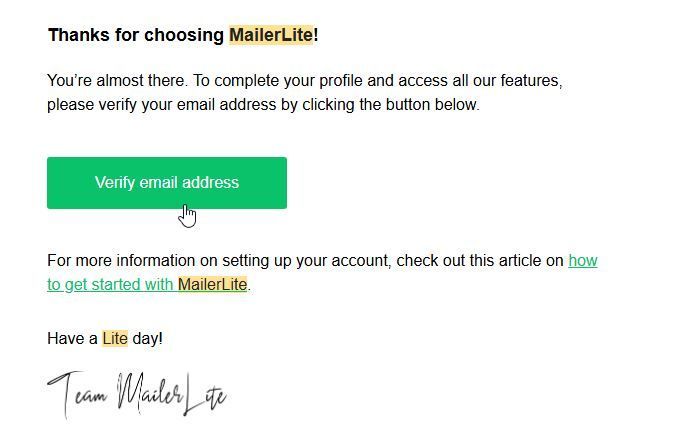
2. Verify your email address
- Open the mailbox with which you created an account.
- Open the email from MailerLite which says 'Please verify your email address'.
- Click in the email on the button 'Verify email address'.
(3 minutes)
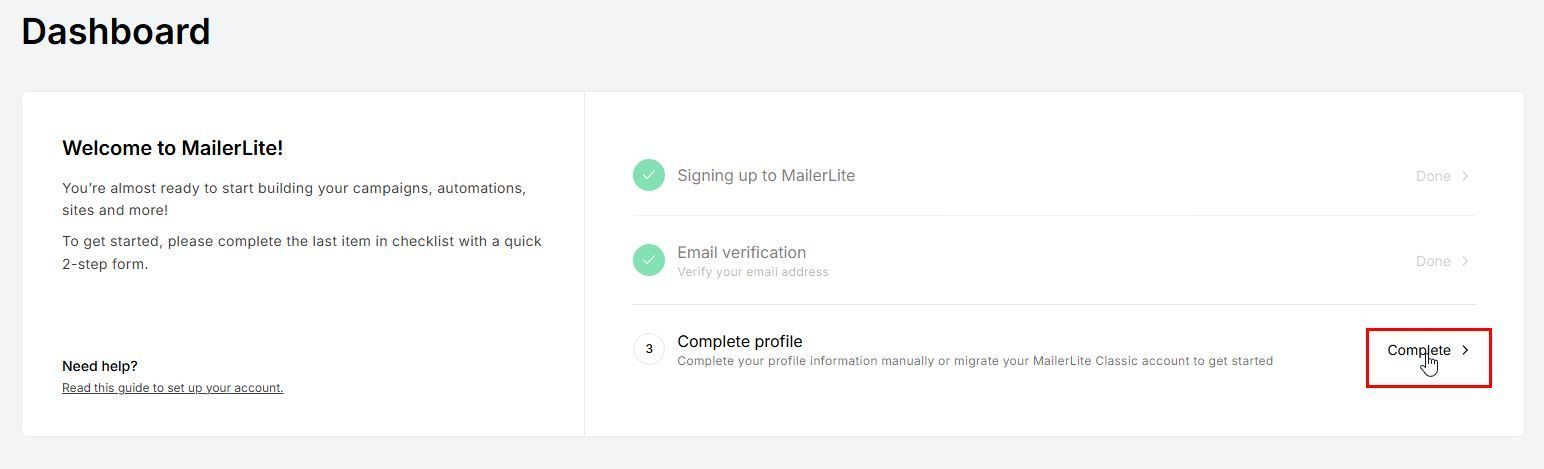
3. Complete your profile
- Log into your account.
- Click on the button 'Complete' at the right side.
- Fill in your last name, select your industry and the following options 'Campaigns', 'Forms' and 'Automations'
- Click on the click on the green button 'Next step'.
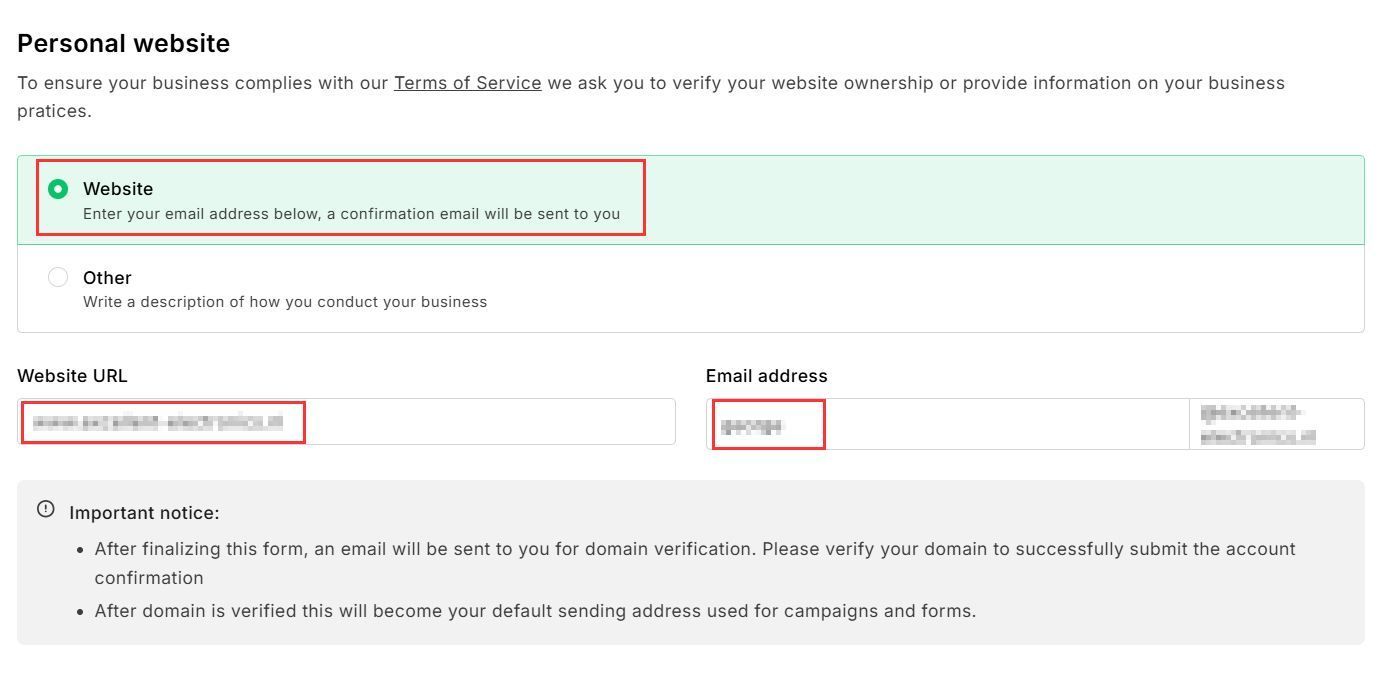
- Fill in the address of your business.
- Mark the checkbox 'I have read and agree to MailerLite's Anti-Spam policy.
- Click on the green button 'Confirm'.
(8 minutes)
4. Confirm your account
- Click at the Dashboard again on 'Complete'.
- Fill in the questions about your subscribers and your website details and click on the green button 'Next step'.
- Now first check your mail inbox, before you go further. Didn't receive an email? Click at the top on the yellow message 'Resend'. Click in the email on the button 'Verify email address'.
- Fill in the last questions and click at the bottom on the green button 'Confirm'.
Now your account will be reviewed. You can already continue with the next step.
Do you need help with the setup of your account or creation of newsletters? At Fiverr you can get this done for just 14 USD. Check it here.

(10 minutes)
5. Import email addresses
- Click in the menu at the left side on 'Subscribers'.
- Click at the right side on the green button 'Add subscribers'.
- Upload your list with email addresses or copy paste them from Excel.
Getting an error? Please check this complete article. You can also divide your list in groups and segments. Here is an explanation.
(30 minutes)
6. Create your first newsletter
- Click in the menu at the left side on 'Campagnes'.
- Click on the button 'Create'.
- Enter a campaign name (for internal use only) and select 'Regular campaign'.
- Click Save and continue.
- Fill out the "subject name" and the "sender information" (and the Tracking options if you like).
- Click Next step.
- Select the Drag & drop editor.
- Now you can start designing your newsletter before sending it to your subscribers.
This is more information about sending your newsletter.
Need more information on how the editor works to create your newsletter?
Here you will find the full article.
Before you can send the newsletter, you need to authenticate your domain. This is quite easy for most providers. You can follow this video on YouTube.
It is a bit more technical if you need to add (so called) DNS settings at your hosting provider. Don't want to do it yourself? At Fiverr you can get this done for just 14 USD. Check it here.
Thank you very much for your support
Some of the links on this page may be affiliate links, which can provide compensation to us at no cost to you, if you decide to purchase a paid plan. Thank you! These are products we personally use and stand behind.